Friday 10 August 2012

Building the Box: Two


Welcome to Part Two of my how-to guide to building the Dagobah Box! Part One is here if you want to get caught up, otherwise, let’s get going!


Before properly fixing the tree into place, I needed to decide upon a background. I’d originally wanted to paint my own background, and did a quick mock up with pastels, but wasn’t really happy with the effect. I also tried a print out of a dark, Dagobah swamp-esque image, but the colours and scale didn’t really match. After trial and error with these images, I eventually settled on the image from the film (and the OTC box-art), showing Luke’s partially sunken X-Wing in the distance. 

Pen & Pastel Backdrop
Generic Swamp Backdrop
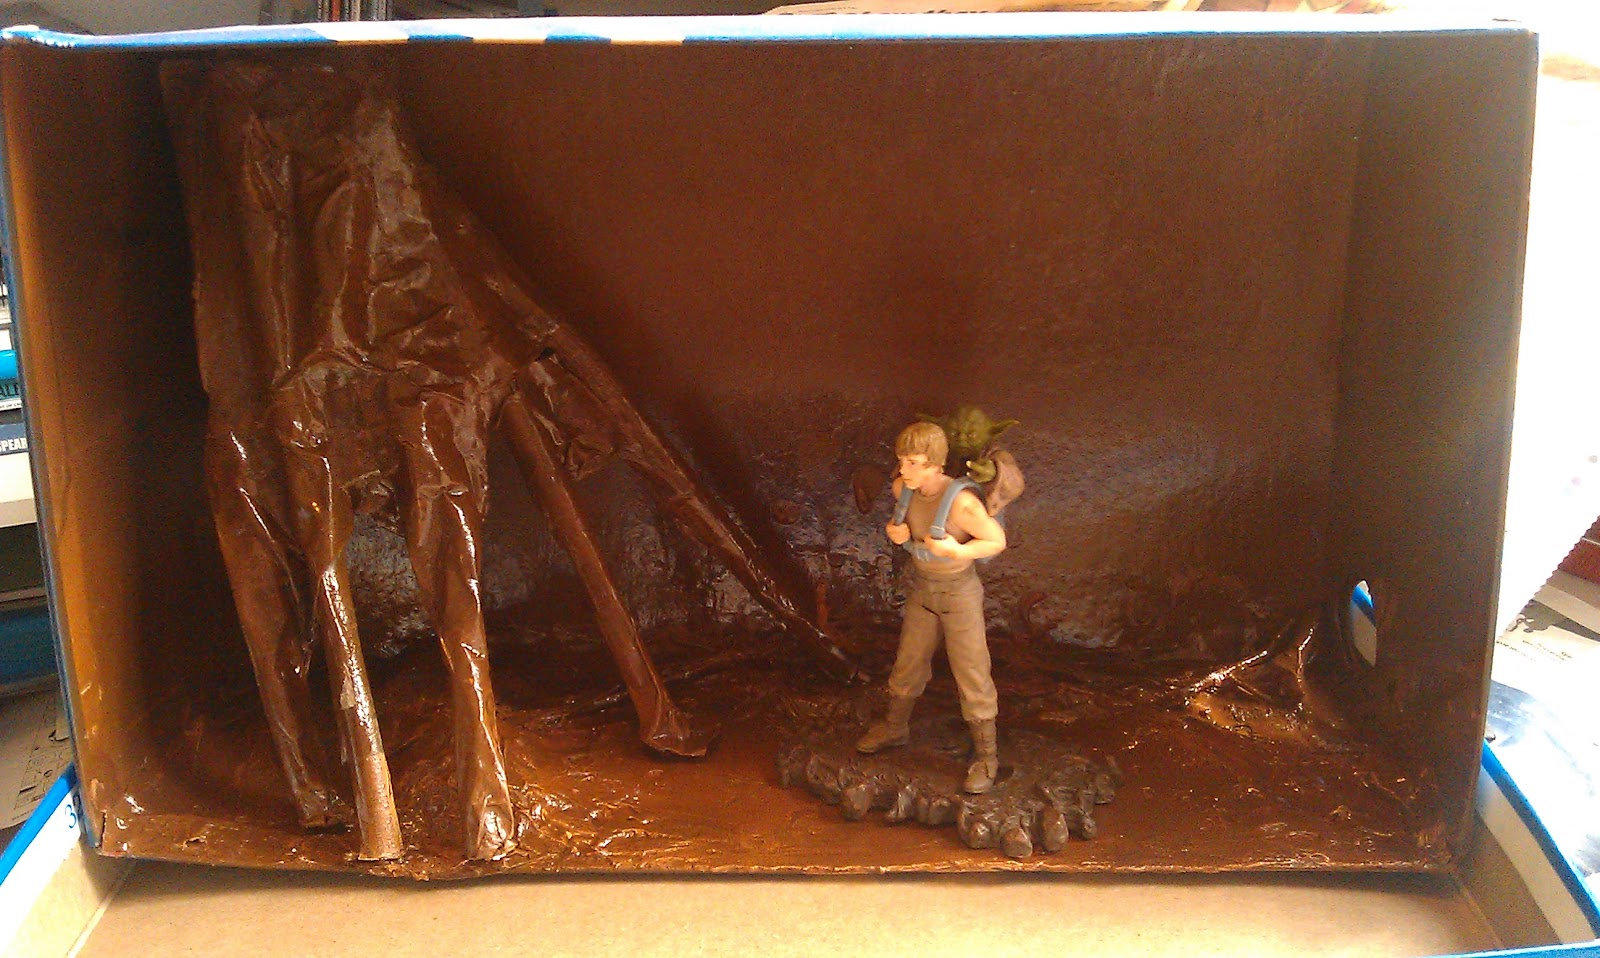
I dry-brushed the floor of the box with dark green acrylic paint to to help achieve the swamp effect, and then added more branches to the tree, twisting some regular garden twine around the branches to form vines, and covered it in moulding plaster to add texture and hold it all together. When this was complete I spray painted it brown again, dry brushed it dark green, and fixed it properly into place.

It's come a long way from being a toilet roll tube...
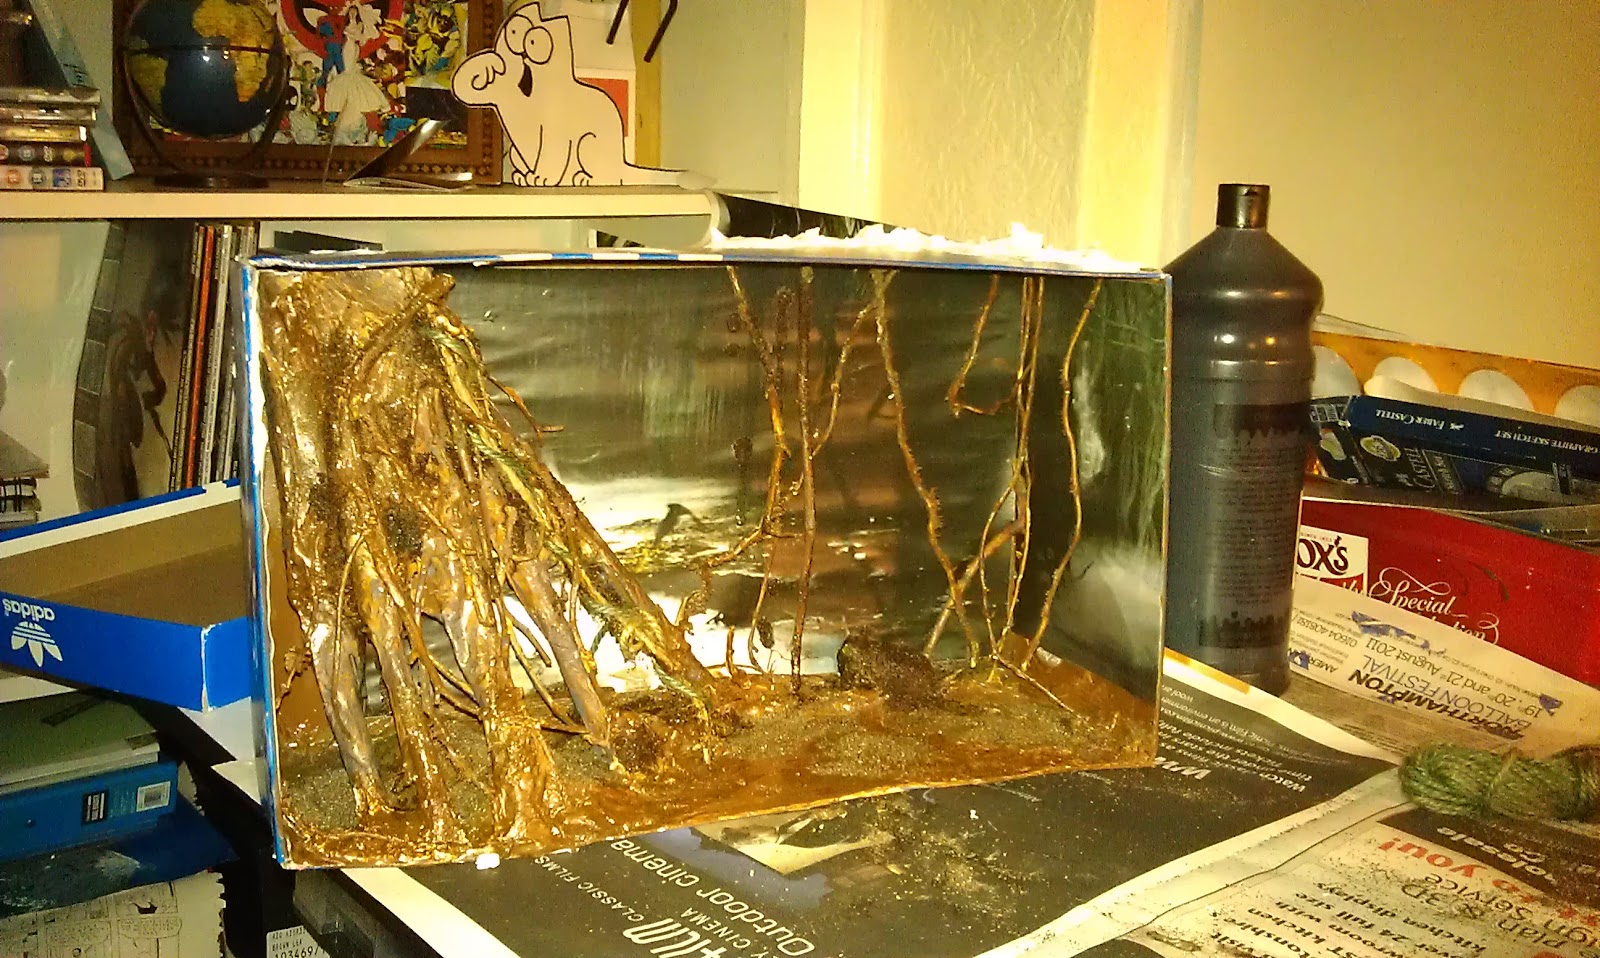
Whilst the spray paint is absolutely the best tool to work with for diorama building (I’m converted!), the gloss left quite a singular, damp look to the floor. To add texture I bought some modelling flock (autumn leaves, if I remember correctly), and used PVA glue to apply it to certain areas of the floor and tree.

Pre-flock...
Almost finished. I cut some holes in the top of the box and poked through some vines from my garden on the opposite side of the tree, and used more modelling clay to add texture. I once again used a base layer of dark brown acrylic paint, dry brushed with dark green, and it was done!

...And finished!
And so, I’ve had it for some time – what do I think of the Box as a set for photography, or as a display piece now? What would I do differently? Well, thank you for asking… :D


As a set, the box has worked well for pictures, but also pretty much served its purpose. As it’s such a small scene, and I can only really photograph in one direction, there isn’t too much more I can do with it. The sides and roof of the box are essential in creating the mood of Dagobah, but unfortunately they limit the lighting options – all I can really do is flood the front with light, whilst trying to avoid too much reflection from the background image.


As a display piece, the box is a bit of a mess. Whilst the scene is suitable, the cardboard box warped as soon as I applied the papier mache, and the shape has become further distorted through applications of paint and wet plaster. I’ve had it sat out on my display shelf before, and as happy as I am with the scene, the presentation looks amateurish. I will absolutely use wood or polystyrene for future displays.

Aside from the materials, I was disappointed with myself for not putting the effort in to paint a custom backdrop. The location of the X-Wing in the background messes up the screen accuracy of the scene, and if you follow the lake from the background it should actually flow right into the box itself! Those two points aside though, I don't think it works that badly.


The most important thing I’ve learned from building the Dagobah Box is that a scene or diorama needs to have a specific purpose from the beginning – be it for screen accuracy, display, play or whatever. I made a lot of choices on the fly whilst making this, and the overall look has suffered. I’ve since made a generic display piece, and having made it for a definite purpose, the final effect is much better. If, and when, I embark on a Dagobah scene again, I fully intend to make it scene specific, use appropriate materials, and hopefully end up with a more satisfactory end result.

Tuesday 7 August 2012

TFA Snarl!

I finally watched the Transformers Animated episode 'Blast from the Past' today, which introduces the Dinobots to that series. Yeah. Let's just say I prefer Wheeljack finding fossils and going from there...

Robot! Dinosaur! Poor Design? Yes!
Snarl was Slag, but his name got changed due to the connotations of the word over here in the UK (a slag being an abusive term implying a person's promiscuity). I'm sure he was originally named after waste metal though, which would've been appropriate, because this Transformer is pretty rubbish. Still, gotta keep the family together!

Sunday 5 August 2012

Building the Box: One


The Dagobah Box is the most ambitious set-piece I’ve made so far; and whilst I’ve thought of many ways to make it better (or to improve version two…) since finishing it, it still works great as a display piece for my Dagobah-themed figures. Here, long overdue for both the Box and this blog, I present a making-off guide, with plenty of WIP shots!

Calvin & Hobbes: Essential reading for everyone.
First of all I found an ordinary shoebox, as inspired by Calvin’s diorama school project. The first challenge for me was to decide which part of Dagobah I wanted to show. The box wasn’t big enough for my POTF2 X-Wing, so I ruled out doing the crash site. I considered making Yoda’s hut, but the box dimensions would have made it really squashed, so that was scratched also. I knew I would primarily be using the set to display the OTC Dagobah wave figures, and so, following a lot of research (by which I mean the hardship of watching Empire Strikes Back :D), I decided on the clearing where Luke has the vision of Cloud City.


I made the tree by selecting several suitable branches from my garden, and chopping them down to the right size. I used a toilet tissue roll as the main trunk of the tree, and then positioned the branches as the roots, holding them in place with masking tape.


Using off-cuts of card and branches to add texture to the ground, I then covered the floor of the box and the tree with papier mache, to unify all the different elements and create a base texture. After letting the glue dry, I checked the scale against the box’s soon-to-be residents…


I used a glossy brown spray paint to completely coat the inside of the box and the tree. Using spray paint was far superior to anything I would’ve done with acrylics and a brush, as the coating was so much more complete and even, as well as quicker to do. I felt at this point however that the box was too sparse, and needed more texture. To achieve this I took several smaller branches from my garden and put them around the floor, as logs and other swamp detritus. I also toyed with the idea of putting a second tree in on the other side of the box, but decided that I might still need the space.


I covered the floor and the tree in moulding plaster, marking it with my fingers as it dried, and used it to good effect on the tree to pull all the different elements together. I also added more twigs and branches to the tree at this point, to create a denser look. With one more coat of spray paint, the scene was beginning to take shape…


Click through here for Part Two, where I complete the set and look at what went right, went wrong, and how I’d do it differently next time!

Monday 30 July 2012

Ultimate Aliens!

Deep Danger & Steam
Toys that inspire the imagination, that has to be the main aim that most toy makers aspire to, right? And yes, I know the collector market is huge, but it's well made kids toys that creates collectors in the first place. So, toys that inspire the imagination, and that also exist as part of a successful franchise? Double win for the manufacturer. That those toys can be cool looking robot-esque aliens? Well, I guess that would be the icing on the cake! And here I present the Ben 10: Ultimate Alien "Alien Creation Figure Set".

This two pack contains figures of Water Hazard and Ultimate Swampfire, members of the Orishan and Methanosian species respectively (apparently; I'm learning all this as I go!); and also a small green key with the Ben 10 hourglass logo on it.

Water Hazard
Water Hazard is the red and black guy, with a solid protective shell and the ability to project pressurised blasts of water. Ultimate Swampfire is an evolved version of Swampfire (Regular Swampfire?), with a body made of petrified wood and the ability to shoot blue flames when he puts his hands together. It was the mixture of the two of them that made me pick this set up over one of the many others; I liked Water Hazard's look and the bulk of Swampfire, with the small scale sealing the deal. Without knowing anything about the characters prior to picking them up, I've gotta say that the designs are very cool. If I were a kid today, I would most certainly be a Ben 10 fan, and that's before we get to the best bit...

Ultimate Swampfire
That small green key with the hourglass logo that I mentioned? Well, that plugs into the back of the figures and causes the limbs and head to pop off, leaving five pieces of each action figure that can be jumbled up and re-assembled in whatever way you like. As a kid this would most likely have caused my tiny mind to explode; and this capability to create new combinations of characters with their own unique powersets is one I can really appreciate. And then there's the value. I picked up this set from Home Bargains in Northampton, where there's a good selection for the bargain price of £1.99. A cursory glance shows TRU are retailing theirs at £6.99, so it's a ridiculously good deal if you can find them. 

Anyway, let the re-assembly commence!

Steam
Steam is the dual-processing (read: two-headed) bio-bot with the ability to transform his body into pourous steam, or an indestructible rock solid mass. What he lacks in offensive capabilities he makes up for in intelligence and leadership, making strategy calls based on a mixture of experienced intuition and hard computer logic.

Deep Danger
Deep Danger is a machine first and foremost, but augemented with additional biologics to provide him with awesome strength. A warrior on the battlefield, Deep Danger trusts Steam implicitly, and will follow orders to the letter. This lack of independent thinking would be a weakness to some, but Deep Danger's ability to project incredibly powerful force blasts ensures he always gets the job done.


But sometimes, all the tactical nous and brute force in the imaginative world isn't enough to save you from a giant hand wielding a green key...


These figures are stylish and provide hours of fun. Even if you're not a Ben 10 afficionado (like myself), there's something worthwhile here, and for £1.99 you really can't go wrong.

Thursday 26 July 2012

Just Where Do You Think You're Going?

"You're fortunate he doesn't blast you into a million pieces right here" - Really, 3PO?
Quick post here. I didn't think too much about the practicality of this little Tatooine backdrop when I made it, because if I had, I would definitely have made it bigger. Of course, had I made it bigger, then I'd no longer have any excuses for not owning a TVC Landspeeder. ..


You may like...

Related Posts Plugin for WordPress, Blogger...