Showing posts with label Set Building. Show all posts

Thursday 1 August 2013

On Location

Leo going solo.
I re-arranged my Flickr sets today, and as I pored over the photographs from the last three years I was struck by how bad some of my initial efforts were. Unfortunately, some of the more recent ones stuck out as well, and it struck me that my biggest issues are lighting and setting, two of the three key components of a photograph (the third being the subject). I thought I'd pay a little attention to this for today's post...

Leader in blue!
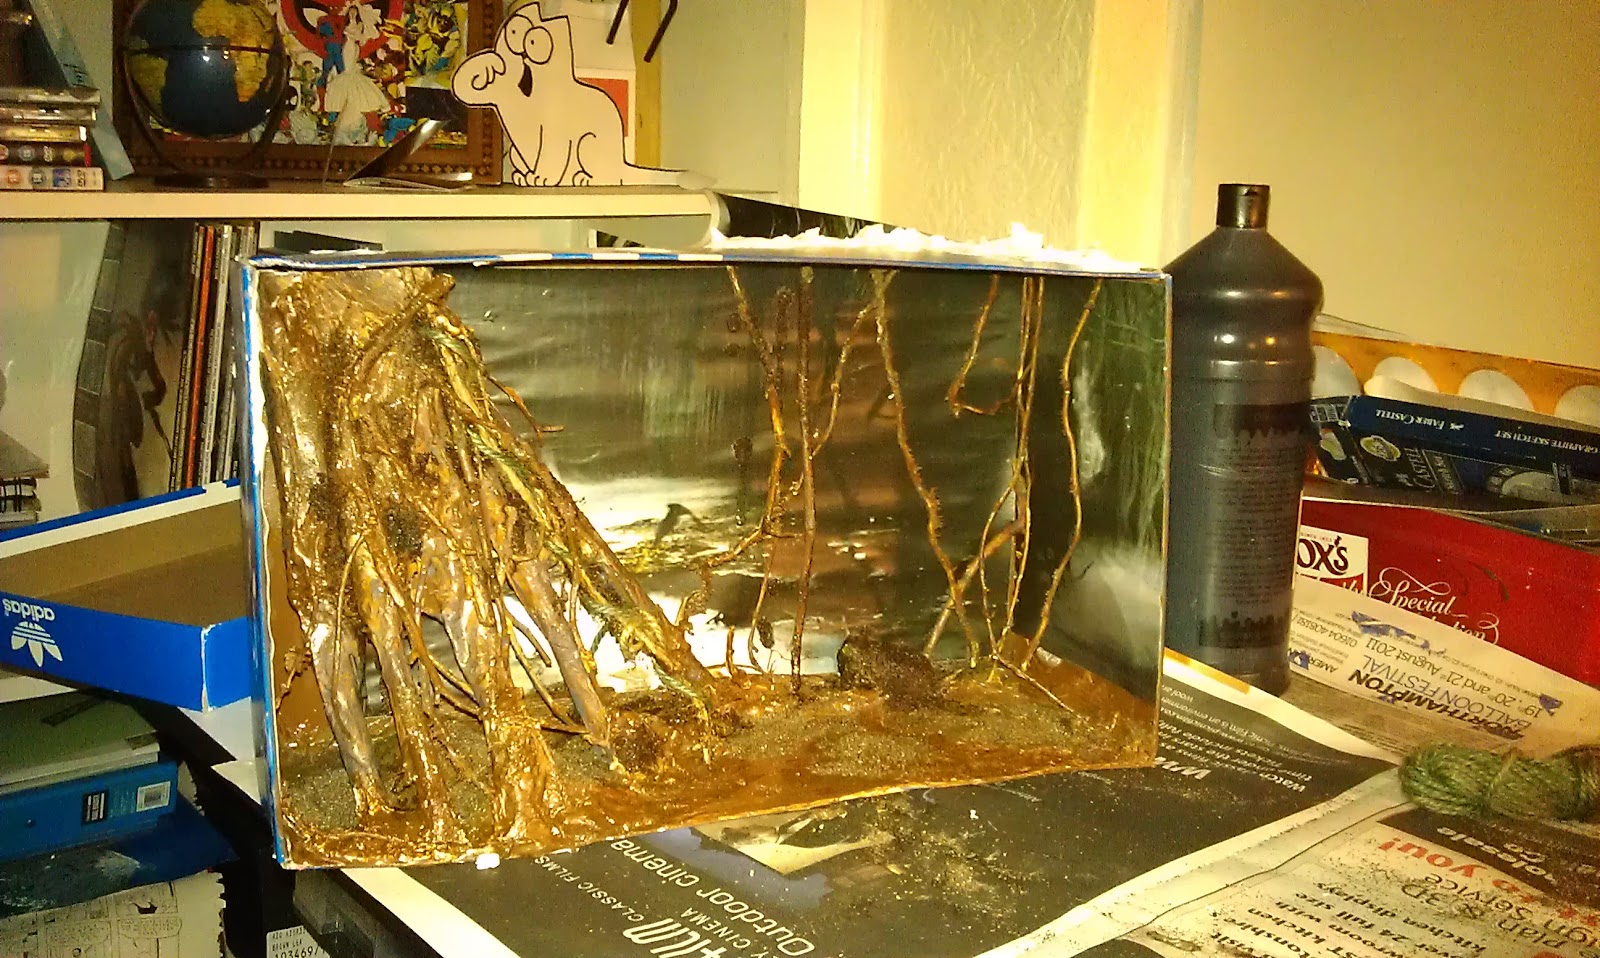
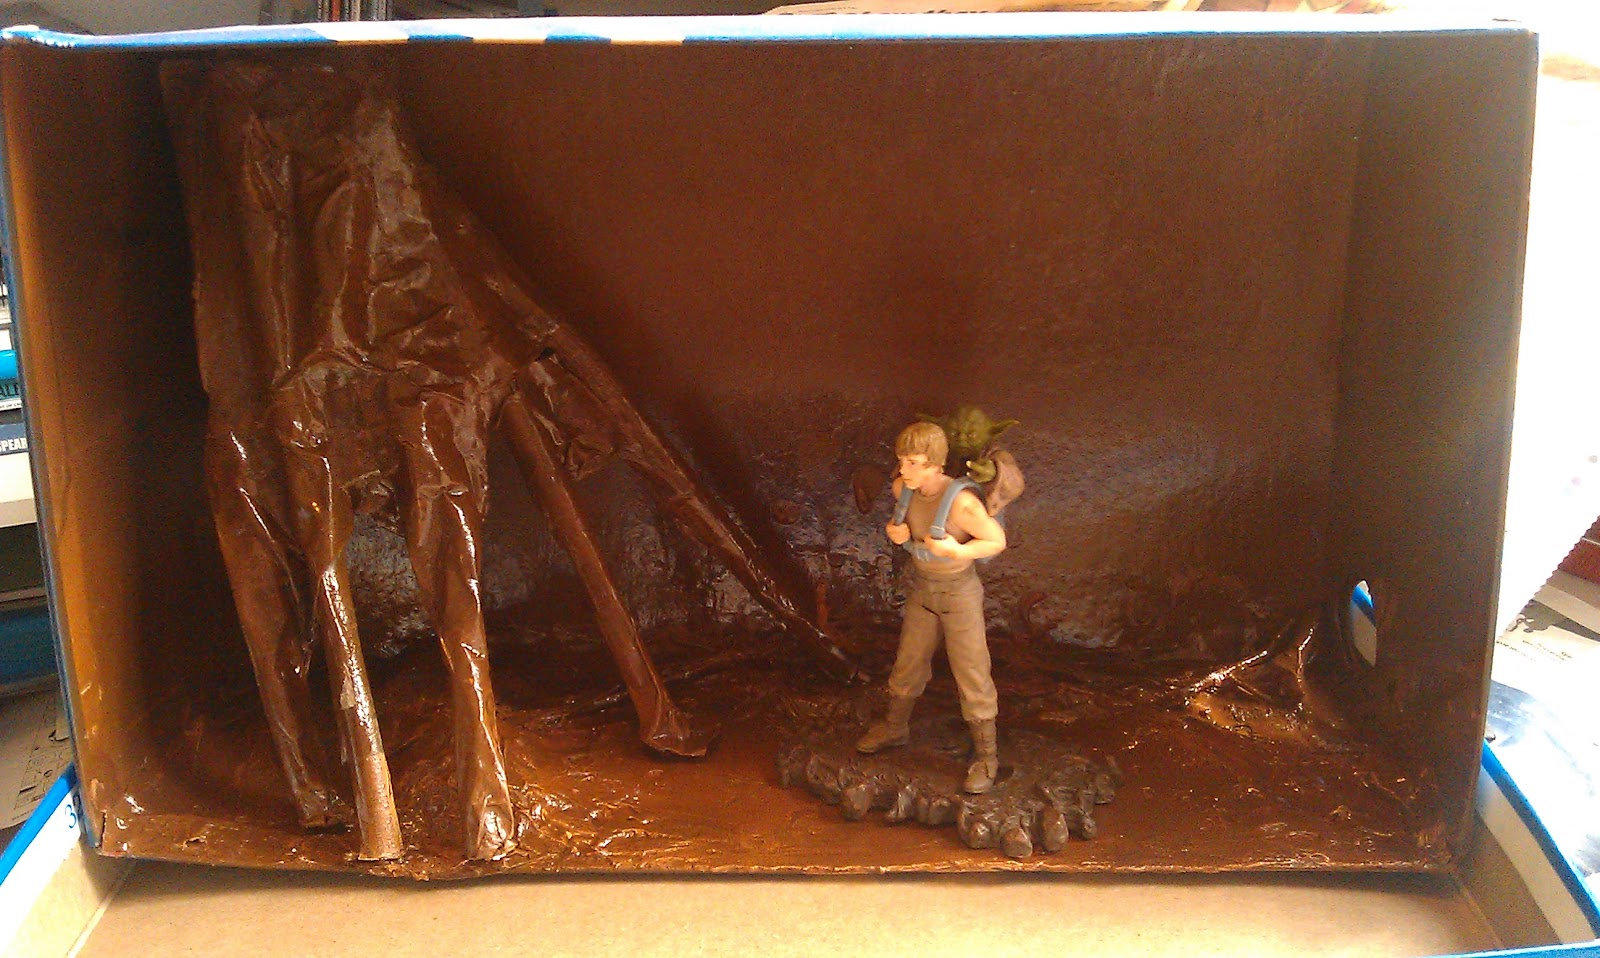
It's unfortunate that I don't have room to store different sets, much less the time to build them nowadays, and a cluttered house doesn't really cut it as a backdrop when photographing 1:18 scale figures. Fortunately though, as fantastical as Star Wars is, if you live near a swamp, woodland, desert or beach, or even some destitute scrub land, you've got the ideal setting for your action figure photographs. Although living in the middle of the UK isn't ideal for a desert or beach, it more than does the job when looking at Dagobah or Endor...

BTS: The glory of cropping!
But what about the urban heroes? Northampton really isn't much of a cityscape, the lift tower being the sole defining feature of the skyline, and if I struggle with building a set for something fictional, I think I'd really mess up a scale recreation of an NYC rooftop. So how best to photograph them? Why, multistory car parks, of course!
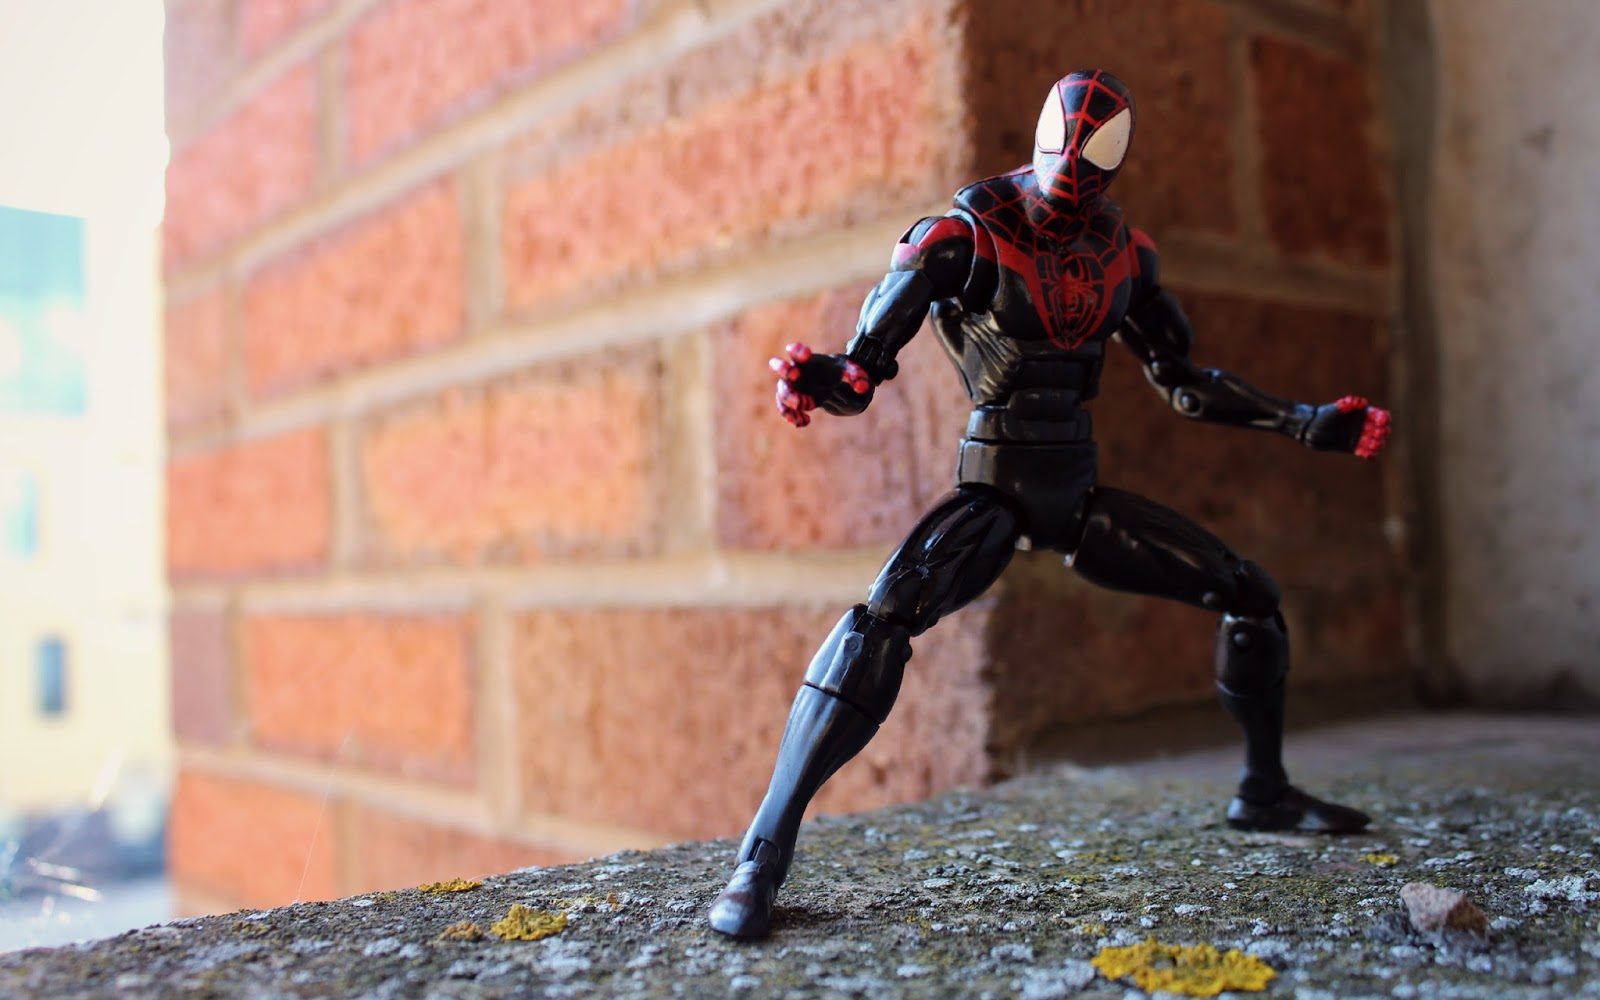
Miles Morales...
I frequently try and find a lighting set-up that works best for me at home, in the lightbox or otherwise, but hands down using natural light is the best. The colour balance looks right, and if you pick a  good spot (somewhere open but out of direct sunlight) the lighting is crisp and even across the subject. Occasionally you may need to use a reflector to get the light to go exactly where you need it, but you should be fine without. Also, the more light that is available, the less your camera has to compensate by auto-filling information. This is what happens when dark pictures appear grainy; there's not enough information for the camera to create a whole picture, so it fills in the gaps itself. It's always better to shoot light and darken the image in post, if needs be.

...the Ultimate Spider-Man!
A car park fits the bill of being somewhere open but out of direct sunlight, and provides a gritty and urban setting for our more 'street' figures, with a view across the rooftops to boot. Furthermore during the day the higher-up levels of the car park are rarely used, providing all the privacy a grown man playing with toys in public needs!

Ninja Protector!
It's not perfectly to scale, but the car park fits the bill well enough, and it's nice to finally have somewhere to play with capture my superhero figures at work. What's even better is that I'm finally starting to get the quality of photograph that I've been after since I started. Onwards and upwards, I suppose...

Good luck with your own on location shooting, and thanks for reading!

Sunday 23 September 2012

The Streets of Mos Eisley: Re-made!

Following the incident at the Cantina, the Droids aren't the only ones wanted by the Empire...
I'm working on a new display piece for my many Tatooine figures. The moisture vaporator is a key prop, although the 30th Anniversary Luke Skywalker it came with isn't as good as the one in the picture, which comes from the Blu Ray Commemorative A New Hope set (same as Obi Wan Kenobi, in fact). That's what I love about coming a bit later to the Star Wars party; at this point I can pick and choose the best versions of each character...

Ain't no-one taking Palpatine's moisture... *shudder*
The moisture vaporator is the one diorama piece that instantly makes a set indisputably Tatooine, and you could argue that it's not even convincingly Mos Eisley (or Anchorhead, or even Mos Espa) without it. Of course, a few more Sandtroopers, Droids, Aliens and Landspeeders wouldn't go amiss either, but everyone has a budget, which I've certainly blown for a few months with my latest haul (not the vaporator - exciting news to follow, pending shipping :D)! This set is still very much a work in progress; but I have plenty of photos for a making-of when it's finally done. Just a shame I still can't decide for sure between set-building for photography, and diorama creation for display...

Friday 10 August 2012

Building the Box: Two


Welcome to Part Two of my how-to guide to building the Dagobah Box! Part One is here if you want to get caught up, otherwise, let’s get going!


Before properly fixing the tree into place, I needed to decide upon a background. I’d originally wanted to paint my own background, and did a quick mock up with pastels, but wasn’t really happy with the effect. I also tried a print out of a dark, Dagobah swamp-esque image, but the colours and scale didn’t really match. After trial and error with these images, I eventually settled on the image from the film (and the OTC box-art), showing Luke’s partially sunken X-Wing in the distance. 

Pen & Pastel Backdrop
Generic Swamp Backdrop
I dry-brushed the floor of the box with dark green acrylic paint to to help achieve the swamp effect, and then added more branches to the tree, twisting some regular garden twine around the branches to form vines, and covered it in moulding plaster to add texture and hold it all together. When this was complete I spray painted it brown again, dry brushed it dark green, and fixed it properly into place.

It's come a long way from being a toilet roll tube...
Whilst the spray paint is absolutely the best tool to work with for diorama building (I’m converted!), the gloss left quite a singular, damp look to the floor. To add texture I bought some modelling flock (autumn leaves, if I remember correctly), and used PVA glue to apply it to certain areas of the floor and tree.

Pre-flock...
Almost finished. I cut some holes in the top of the box and poked through some vines from my garden on the opposite side of the tree, and used more modelling clay to add texture. I once again used a base layer of dark brown acrylic paint, dry brushed with dark green, and it was done!

...And finished!
And so, I’ve had it for some time – what do I think of the Box as a set for photography, or as a display piece now? What would I do differently? Well, thank you for asking… :D


As a set, the box has worked well for pictures, but also pretty much served its purpose. As it’s such a small scene, and I can only really photograph in one direction, there isn’t too much more I can do with it. The sides and roof of the box are essential in creating the mood of Dagobah, but unfortunately they limit the lighting options – all I can really do is flood the front with light, whilst trying to avoid too much reflection from the background image.


As a display piece, the box is a bit of a mess. Whilst the scene is suitable, the cardboard box warped as soon as I applied the papier mache, and the shape has become further distorted through applications of paint and wet plaster. I’ve had it sat out on my display shelf before, and as happy as I am with the scene, the presentation looks amateurish. I will absolutely use wood or polystyrene for future displays.

Aside from the materials, I was disappointed with myself for not putting the effort in to paint a custom backdrop. The location of the X-Wing in the background messes up the screen accuracy of the scene, and if you follow the lake from the background it should actually flow right into the box itself! Those two points aside though, I don't think it works that badly.


The most important thing I’ve learned from building the Dagobah Box is that a scene or diorama needs to have a specific purpose from the beginning – be it for screen accuracy, display, play or whatever. I made a lot of choices on the fly whilst making this, and the overall look has suffered. I’ve since made a generic display piece, and having made it for a definite purpose, the final effect is much better. If, and when, I embark on a Dagobah scene again, I fully intend to make it scene specific, use appropriate materials, and hopefully end up with a more satisfactory end result.

Sunday 5 August 2012

Building the Box: One


The Dagobah Box is the most ambitious set-piece I’ve made so far; and whilst I’ve thought of many ways to make it better (or to improve version two…) since finishing it, it still works great as a display piece for my Dagobah-themed figures. Here, long overdue for both the Box and this blog, I present a making-off guide, with plenty of WIP shots!

Calvin & Hobbes: Essential reading for everyone.
First of all I found an ordinary shoebox, as inspired by Calvin’s diorama school project. The first challenge for me was to decide which part of Dagobah I wanted to show. The box wasn’t big enough for my POTF2 X-Wing, so I ruled out doing the crash site. I considered making Yoda’s hut, but the box dimensions would have made it really squashed, so that was scratched also. I knew I would primarily be using the set to display the OTC Dagobah wave figures, and so, following a lot of research (by which I mean the hardship of watching Empire Strikes Back :D), I decided on the clearing where Luke has the vision of Cloud City.


I made the tree by selecting several suitable branches from my garden, and chopping them down to the right size. I used a toilet tissue roll as the main trunk of the tree, and then positioned the branches as the roots, holding them in place with masking tape.


Using off-cuts of card and branches to add texture to the ground, I then covered the floor of the box and the tree with papier mache, to unify all the different elements and create a base texture. After letting the glue dry, I checked the scale against the box’s soon-to-be residents…


I used a glossy brown spray paint to completely coat the inside of the box and the tree. Using spray paint was far superior to anything I would’ve done with acrylics and a brush, as the coating was so much more complete and even, as well as quicker to do. I felt at this point however that the box was too sparse, and needed more texture. To achieve this I took several smaller branches from my garden and put them around the floor, as logs and other swamp detritus. I also toyed with the idea of putting a second tree in on the other side of the box, but decided that I might still need the space.


I covered the floor and the tree in moulding plaster, marking it with my fingers as it dried, and used it to good effect on the tree to pull all the different elements together. I also added more twigs and branches to the tree at this point, to create a denser look. With one more coat of spray paint, the scene was beginning to take shape…


Click through here for Part Two, where I complete the set and look at what went right, went wrong, and how I’d do it differently next time!

You may like...

Related Posts Plugin for WordPress, Blogger...