

The Dagobah Box is the most ambitious set-piece I’ve made so
far; and whilst I’ve thought of many ways to make it
better (or to improve version two…) since finishing it, it still works great as a display piece
for my Dagobah-themed figures. Here, long overdue for both the Box and this blog,
I present a making-off guide, with plenty of WIP shots!
 |
| Calvin & Hobbes: Essential reading for everyone. |
First of all I found an ordinary shoebox, as inspired by Calvin’s
diorama school project. The first challenge for me was to decide which part of Dagobah
I wanted to show. The box wasn’t big enough for my POTF2 X-Wing, so I ruled out
doing the crash site. I considered making Yoda’s hut, but the box dimensions would
have made it really squashed, so that was scratched also. I knew I would primarily
be using the set to display the OTC Dagobah wave figures, and so, following a
lot of research (by which I mean the hardship of watching Empire Strikes Back
:D), I decided on the clearing where Luke has the vision of Cloud
City.

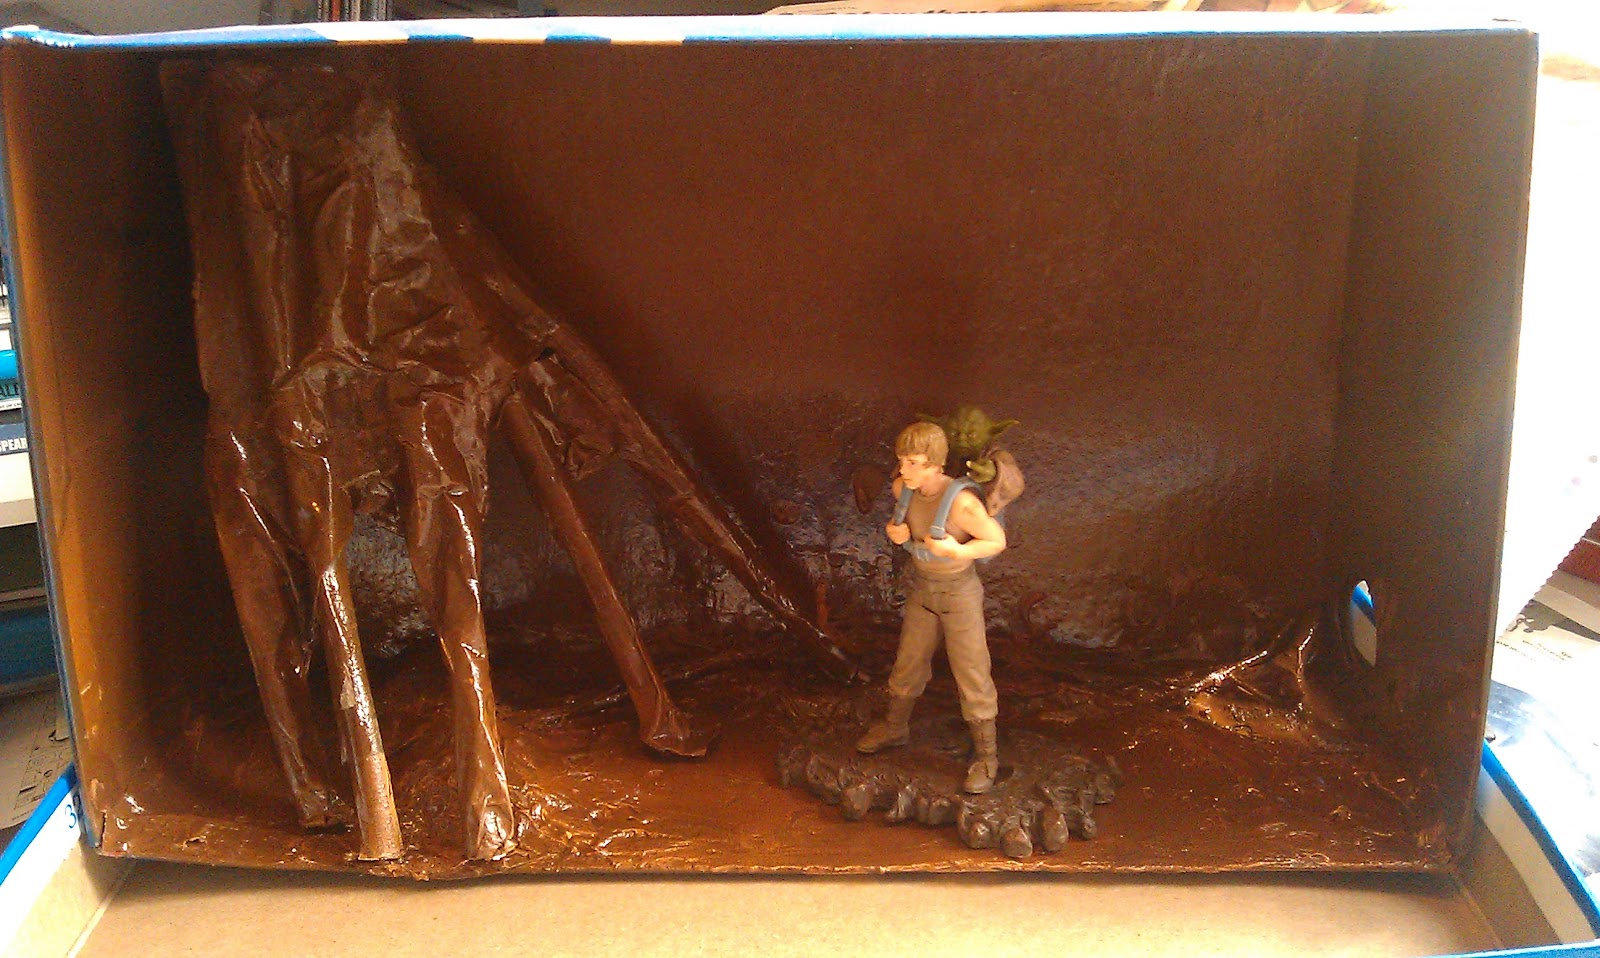
I made the tree by selecting several suitable branches from
my garden, and chopping them down to the right size. I used a toilet tissue roll
as the main trunk of the tree, and then positioned the branches as the roots,
holding them in place with masking tape.

Using off-cuts of card and branches to add
texture to the ground, I then covered the floor of the box and the tree with papier mache, to unify all the different elements and create a base
texture. After letting the glue dry, I checked the scale against the box’s
soon-to-be residents…

I used a glossy brown spray paint to completely coat the
inside of the box and the tree. Using spray paint was far superior to anything
I would’ve done with acrylics and a brush, as the coating was so much more
complete and even, as well as quicker to do. I felt at this point however that the box was too sparse,
and needed more texture. To achieve this I took several smaller branches from
my garden and put them around the floor, as logs and other swamp detritus. I
also toyed with the idea of putting a second tree in on the other side of the
box, but decided that I might still need the space.

I covered the floor and the tree in moulding plaster, marking
it with my fingers as it dried, and used it to good effect on the tree to pull
all the different elements together. I also added more twigs and branches to
the tree at this point, to create a denser look. With one more coat of spray
paint, the scene was beginning to take shape…
Click through here for Part Two, where I complete the set and look at
what went right, went wrong, and how I’d do it differently next time!
No comments:
Post a Comment